Evidence Status
How verified is this guide?
- Version checked
- v1.7, checked May 24, 2026
- Route verified by
- Late-game route advice is public-video cross-checked and based on repeated state-change failure patterns.
- Spoiler level
- Medium, with explicit spoiler route folded.
- Unknowns
- Exact Level 7 state order may vary; state-change logic is kept separate from unverified fixed-step claims.
- Source base
- Official itch.io page, official v1.7 devlog, Major Jam listing, public videos
Quick hint, no spoilers
Pause after every state change
After each pickup, switch, or exit step, assume Cobb's available senses may have changed and check distance before moving again.
Evidence screenshots
What each screenshot supports

Rule screen
Read the active rule as a route command. If the sentence changes, your old safe lane may be wrong.
- Source
- Official itch.io screenshot / GIF asset cached locally for fan-guide context.
- Proves
- Rules are presented as active room information.
- Objective marker
- Use visible pickup, switch, exit, or room prompt as the current objective.
- Danger lane
- Any route that ignores the active rule text.
- Safe loop
- Outer lane first, objective second, return lane third.
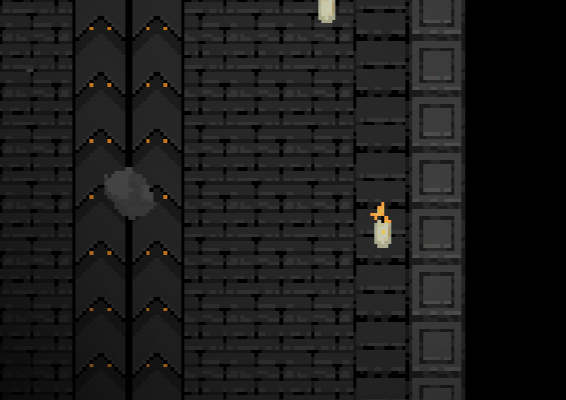
Open lane pressure
Do not cross open space until Cobb is offset and you already know the return path.
- Source
- Official itch.io screenshot / GIF asset cached locally for fan-guide context.
- Proves
- Open lanes and visibility shape safe routes.
- Objective marker
- Use visible pickup, switch, exit, or room prompt as the current objective.
- Danger lane
- Long open crossing while Cobb has line pressure.
- Safe loop
- Outer lane first, objective second, return lane third.
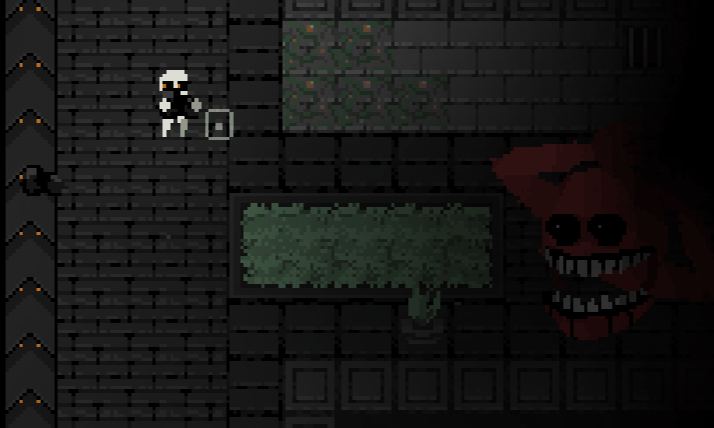
Objective room
Treat switches, pickups, furnace steps, and exit triggers as state changes, not simple errands.
- Source
- Official itch.io screenshot / GIF asset cached locally for fan-guide context.
- Proves
- Objectives can be room interactions, not just exits.
- Objective marker
- Visible room interaction or furnace-style objective area.
- Danger lane
- Direct path after interacting with the objective.
- Safe loop
- Outer lane first, objective second, return lane third.
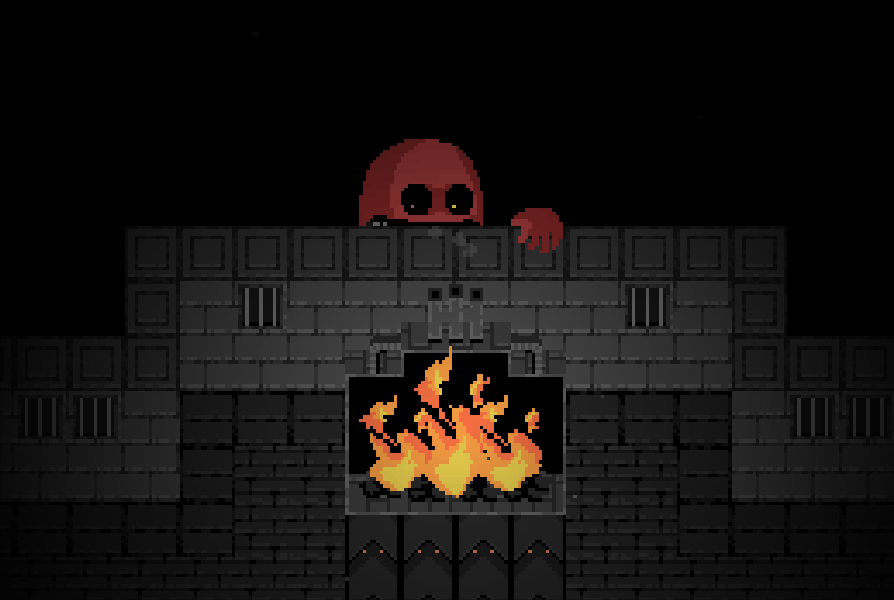
Late-game pressure
When reach, smell, duplicate, or restored senses are active, nearby hiding becomes a failure point.
- Source
- Official itch.io screenshot / GIF asset cached locally for fan-guide context.
- Proves
- Late pressure makes close routes unsafe.
- Objective marker
- Use visible pickup, switch, exit, or room prompt as the current objective.
- Danger lane
- Nearby hiding when reach, smell, duplicate, or restored senses are active.
- Safe loop
- Outer lane first, objective second, return lane third.
Level 7 route
Recommended route map
Objective: Complete one interaction at a time, then re-check the rule state before the next move.
Safe lane: Checkpoint, interact, re-read, rotate to the next checkpoint.
Failure point: Chaining multiple actions without re-solving the room.
StartLoopCobb
BackupWaitGoalSight
ExitWideReturn
If a sense returns, your old hiding point may become the danger point.
Evidence route sheet
Level 7 route details players actually need
Start state
Read the active rule stack before moving; Level 7 punishes routes copied from the previous room.
Objective order
Trigger one interaction, then stop treating the room as solved.
Player stand point
Hold a checkpoint that has two exits before every pickup or switch.
Cobb route
Let Cobb commit to the long side before crossing a sight or reach lane.
Safe route arrow
Checkpoint -> interaction -> re-read rules -> wide loop -> next checkpoint.
Common death point
Chaining actions after a state change without checking restored senses.
Recovery
Rebuild distance first, then resume the route from a fresh angle.
Why Level 7 is hard
The room teaches state resets
Level 7 is harder because progress changes the problem. A route that was correct before a switch can become wrong after Cobb regains a sense or controls a different lane.
Full solution
Objective -> rules -> route -> recovery
Level objective
Advance through the late-game interaction chain without assuming the previous safe route is still safe after a state change.
Active rules to watch
Expect stacked or returning rules. Move, see, hear, smell, reach, duplicate, and restored senses are all relevant search intents for this page.
Safe route
Split the level into checkpoints. Move to a safe lane, trigger one step, re-check Cobb, then decide whether the same route still works.
Conservative route
Take only one action per cycle. After each action, move to the widest checkpoint and read Cobb again before continuing.
Fast route
Pre-plan the next checkpoint before each interaction. Fast Level 7 play is a chain of small solved moves, not one sprint.
Common mistakes
Trying to finish all late-game actions in one rush, forgetting restored senses, and trusting a route after the rule state changes.
What not to do
Do not use the previous safe spot blindly. Do not stack pickups or switches without a pause. Do not finish through a lane that has become line-of-sight exposed.
Recovery plan
If the ending chain falls apart, rebuild distance first. Then treat the next interaction as a fresh level rather than a continuation of the old route.
Death diagnosis
Why Cobb keeps catching you
I died in open space
Likely cause: Cobb can see
Fix: Break line of sight before crossing and move cover-to-cover.
I died while hiding nearby
Likely cause: Cobb can smell or reach
Fix: Stop camping close. Use the outer loop and add more distance.
Two Cobbs trapped me
Likely cause: Cobb can duplicate
Fix: Your route had one exit. Pull one threat away before touching the objective.
I died right after a pickup
Likely cause: Rule state changed
Fix: Pause after each interaction and rebuild the active-rule list.
The ending feels random
Likely cause: Restored senses
Fix: Treat every final-room action as a new mini-level.
Spoiler layer
Read only if still stuck
Level 7 spoiler route logic
The winning idea is to reset mentally after every action. If the room adds back a sense or ability, your old hide spot may now be the danger zone.
30-second summary
How to beat Level 7
- Treat the first action as only the start of the room.
- After every interaction, stop and re-check Cobb's active abilities.
- If a sense returns, widen the route immediately.
- Finish only when the current route and exit are both safe.
Page FAQ
Fast answers for this guide
Why is Level 7 harder than Level 6?
Level 7 is less about the first route and more about state changes. Each interaction can make the previous safe path unsafe.
How do I recover if Cobb changes direction on Level 7?
Do not reverse through the lane Cobb now owns. Move to a wider checkpoint, let pressure drift, then re-enter from a different angle.
Can I rush Level 7?
A fast route can work only after you know the recovery lane. Blind rushing usually dies to restored senses or a closed exit.
People Also Search
Related Cobb Can Move searches
Sources checked
Authority stack for this page
Use: Official facts: developer credits, platform, input support, rating signal, screenshots, downloadable/browser builds, tags, and current public game metadata.
Authority: Primary official source
Status: Checked May 24, 2026
Use: Version check: v1.7 is a small balancing update affecting smell, long pursuit acceleration, and rock stun behavior.
Authority: Primary official version source
Status: Checked May 24, 2026
Use: Level 6 routing reference: switches first, furnace setup, bottom-lane lure, conveyor timing, and direct escape line. Summarized in original wording.
Authority: Public itch.io community route note
Status: Checked May 24, 2026
Use: Awards and credibility: #1 Overall, #1 Concept, #2 Presentation, #2 Enjoyment, #6 Use of Limitation, ranked from 58 ratings.
Authority: Official jam listing
Status: Checked May 24, 2026
Use: Audience signal only: confirms a major creator episode dated May 21, 2026 with a 35:34 runtime. Not used as gameplay authority.
Authority: Third-party popularity signal
Status: Checked May 24, 2026
Use: Timing reference for early room rhythm and general route pressure. Not treated as official gameplay documentation.
Authority: Specific public gameplay video
Status: Checked May 24, 2026
Use: Route comparison reference for longer progression and late-game pacing.
Authority: Specific public playthrough video
Status: Checked May 24, 2026
Use: Visual reference for late-game pressure and route collapse patterns.
Authority: Specific public gameplay video
Status: Checked May 24, 2026
Guide feedback
Report a route change or ending detail
If a route changes, a new ending is verified, or a control prompt differs in the current build, send the page and what changed. This helps keep the guide source-based instead of rumor-based.
Report a correction
Sources and uncertainty
How this guide is built
Facts such as developer credits, platform, version status, jam rankings, and rating signals come from official itch.io pages, the official v1.7 devlog, and the official Major Jam listing. Route advice is written in original wording from current build observations, public video cross-checks, and aggregated community pain points, not copied comments.
Open the full source library